Shopping cart
$0.00
To us, a pantograph technology like Quilter’s Creative Touch means ultimate freedom in your quilting creativity. If you’ve ever seen a quilt with perfectly tessellated patterns across the entire quilt top, that effect is usually achieved with pantographs. It might sound intimidating, but let us tell you why it’s not.
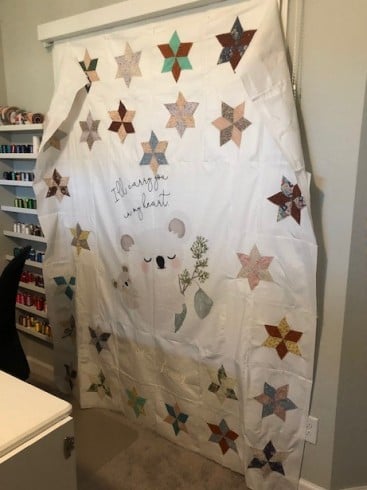
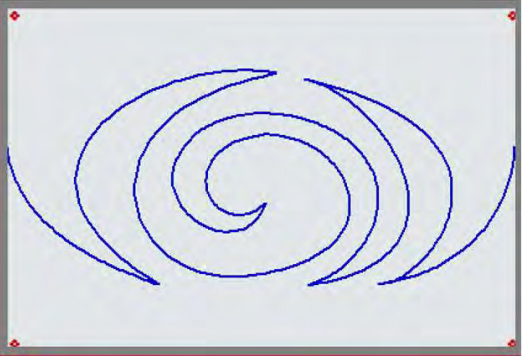
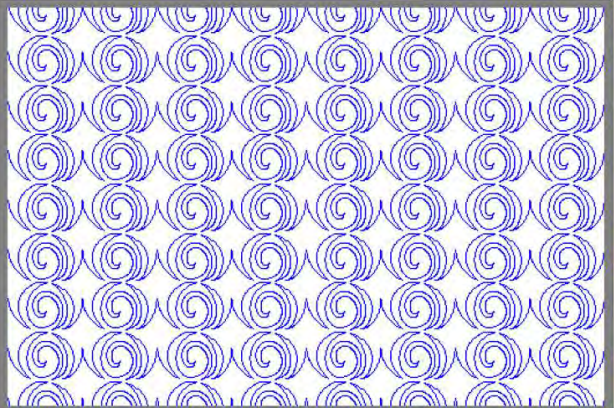
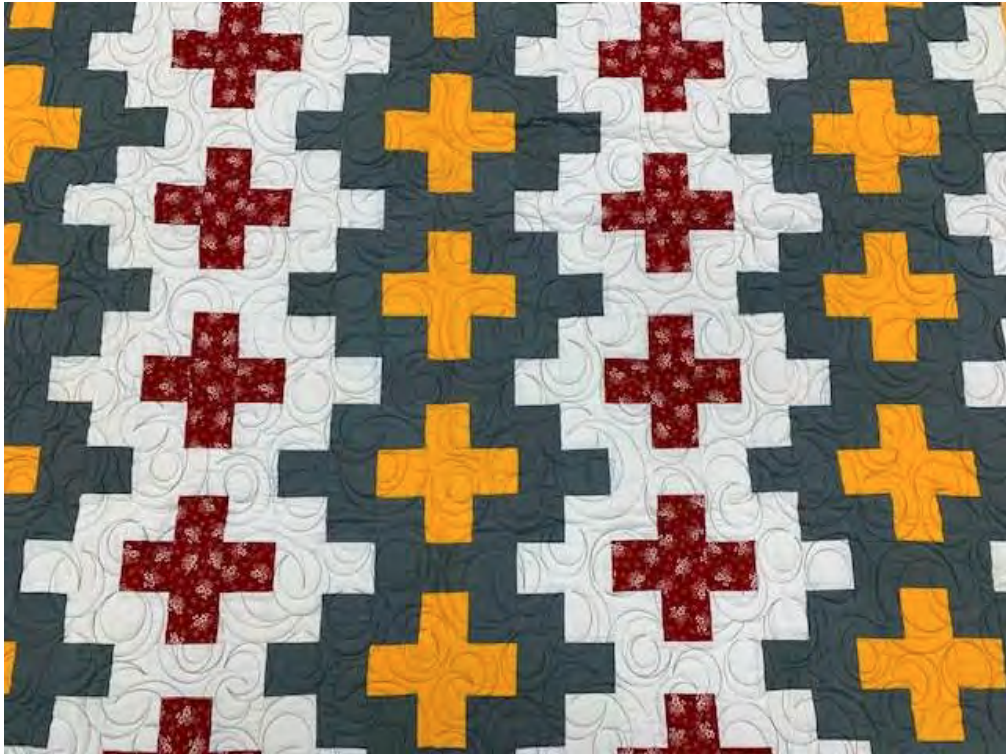
A pantograph or “panto” is a continuous line design. Pantographs allow you to quilt an edge-to-edge design that covers the entire quilt top. Pantographs are also used to quilt borders and sashing borders around your quilt. These patterns can be accomplished by using paper patterns or digital programs like the QCT5. The first of the three photos below show the individual view of a continuous line design, the second is an example of a single pantograph design that works perfectly for borders or sashing, and the last photo is rows of the pantograph repeated to create the edge-to-edge quilt top design.
When using the edge-to-edge design, there is a proportional relationship across the design which is pleasing and balanced to the eye. An edge-to-edge design elevates the quilt design as a whole without highlighting one section over another. The border design adds a polished look to the outside edges of your quilt design. A border can balance or accentuate the center design of your quilt. Quilt border “sashing” designs are, in a way, a combination of the prior two techniques mentioned. Sashing is used to quilt around your quilt block border. This option appears similar to having sewn window panes around your quilt block designs.
The Quilter’s Creative Touch 5 automation system enables you to quilt any pantograph pattern that you can imagine. The technology comes equipped with over 200 patterns in its library and allows you to upload or trace any pattern you desire. The ability to create new pantographs from any source of inspiration is at your fingertips with the QCT automation which means your range of designs is now limitless. Explore all of the QCT features HERE.
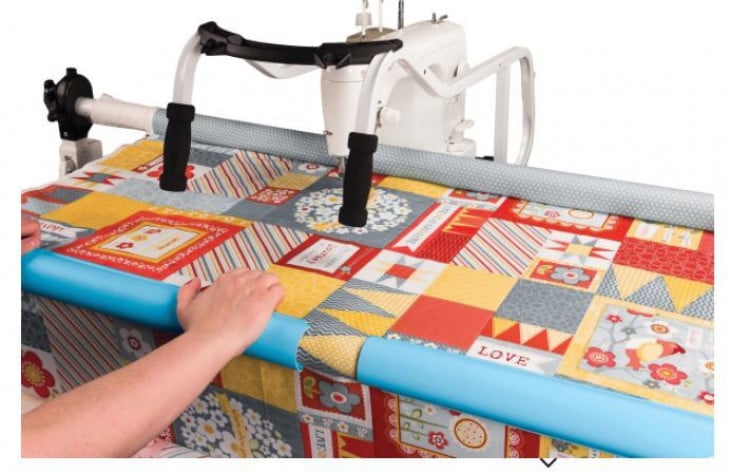
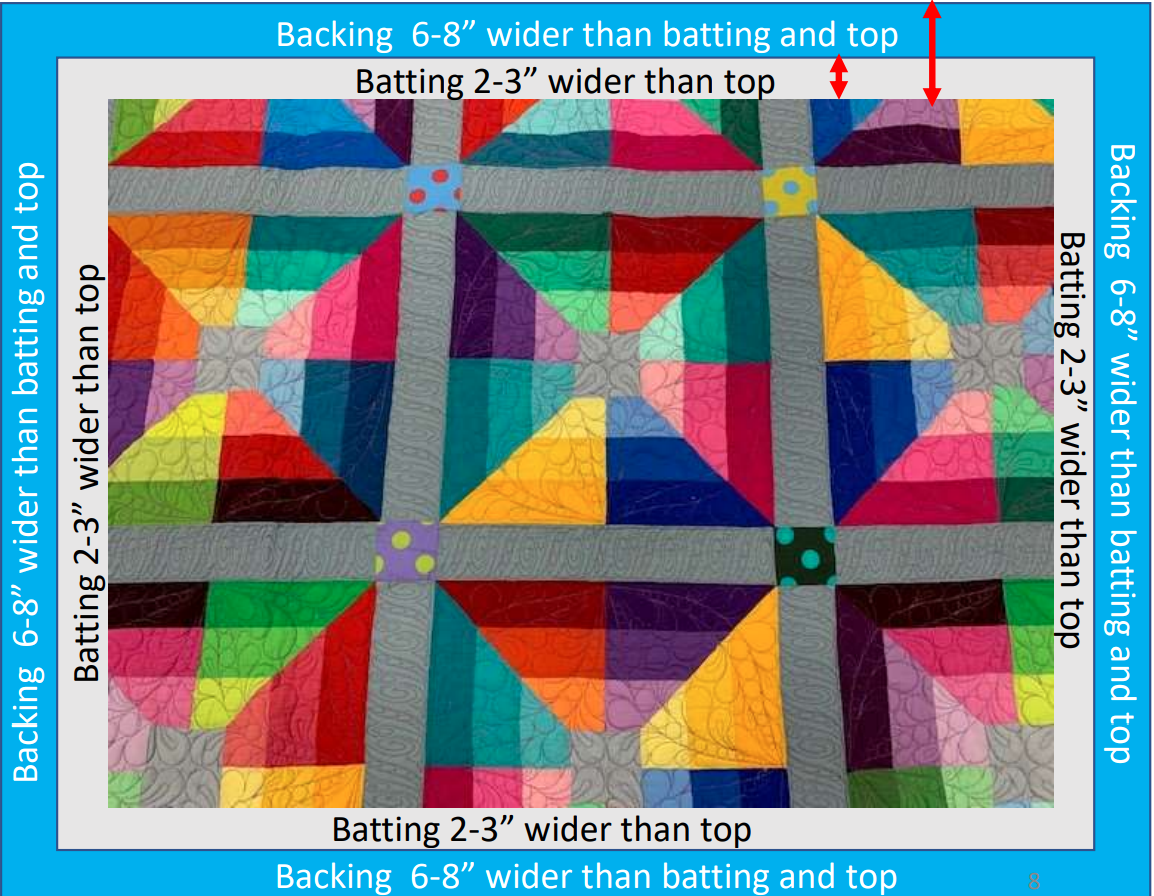
Some helpful things to do before putting your quilt on your frame:
1. Backing should always be wider than your quilt top. 6-8” wider on all four sides.
2. Batting should also be larger than your quilt top (2-3” wider on each side), but smaller than the backing.
3. Measure your quilt top width and height/length write it down.
4. Roll quilt up on a take-up rail toward you or the front of the frame until there is 1.5- 2” unrolled from your top.
5. Baste or sew along the quilt top edges to tack it down. This is important when quilting an edge-to-edge design; your design will sew off the edges of your quilt. If you don’t tack down the edge your hopping foot can get caught and tear your quilt. Start on the left edge as far as the machine can reach, sew along the edge of the quilt top to the upper left corner, and sew toward the upper right corner and down the right edge as far as the machine can reach.
*After every roll tack down the left and right-side edges! When you get to the bottom tack, around the bottom edges as well.
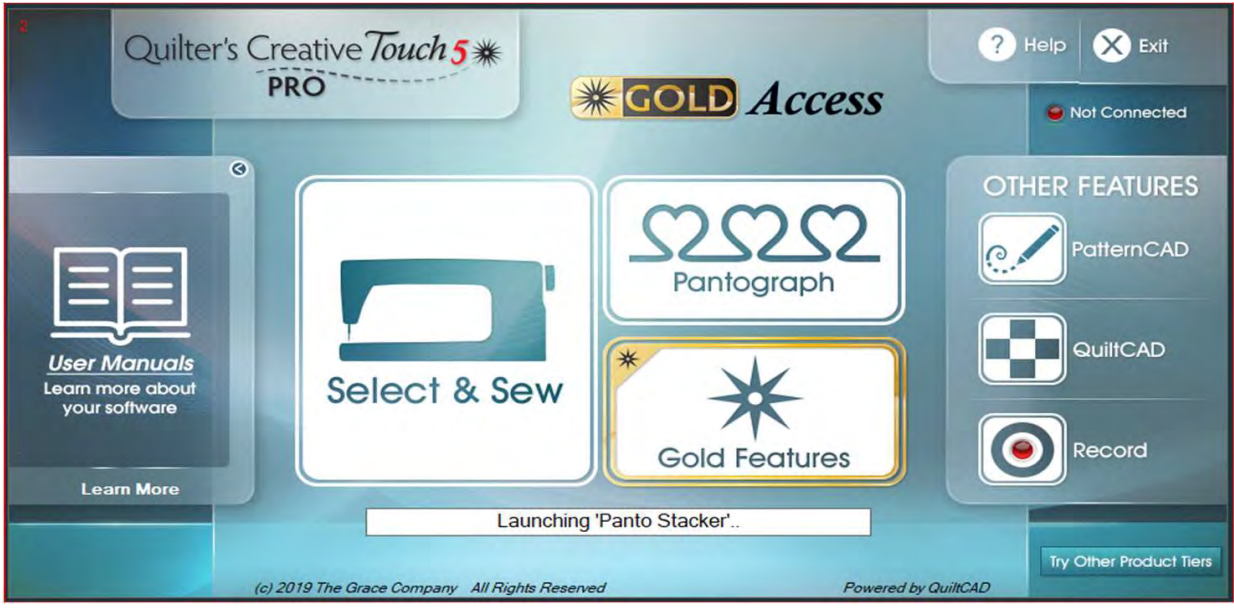
To access the pantograph patterns on your longarm sewing machine, press the “Pantograph” menu prompt pictured above. Now it’s time to set your safe area. The “safe area” is your “quiltable,” space on your quilt top. It will be different for every quilt. The safe area is defined by quilt size, machine throat, and design. For a pantograph edge-to-edge design, you will want to set your safe area just off the edge of your quilt top so the design will sew off the edge slightly. How far off is determined by you and how wide your backing and batting are. Remember, you always want to cut your backing and batting wider than your top.
The following machines are compatible with QuiltMotion QCT5 & QCT5 Beginnings:
Baby Lock
Block RockiT
Elna
Juki
Bernina
Eclipse
Janome
Q’nique
Click HERE to shop and compare the QCT versions, browse the features, and download your free QCT demo.
Now that you have the basics of pantographs down, it’s time to get creative! If you need any further inspiration, we’ll include these QCT Educational Resources:
Click HERE for a step-by-step video tutorial by Grace Company educator, Karla Gerome.
The link HERE will direct you to a written presentation on the setup and features of the QCT technology.
We will never be able to contain our excitement over the innumerable advantages and features of the QCT technology. If you’re on the search to achieve perfectly stitched fonts, designs, and borders on your quilts with absolute ease — we think you’ll share our excitement about it too. Automation should be this easy.
For over 25 years the Grace Company has been the leading manufacturer of high quality quilting frames and quilting accessories. What truly sets The Grace Company apart from other competitors is its level of quality, value, and experience toward all their endeavours. From products to external and internal customer experience, the Grace Company responds to market and customer needs and continues to lead the quilting industry. Grace Company frames and hoops are designed to be easy to build and compatible with most major quilting machines. They'll have the quilting product you need.