Shopping cart
$0.00
If you’re looking for a quick and easy baby blanket gift, you’ve come to the right place. In this segment of the Modern Baby Blanket quilting tutorial, we will cover the preparing and cutting process for this sweet and simple quilt created by Karla Gerome.
Supplies Needed for your Modern Baby Quilt:
Fabric Needed:
1/2 yard Dark Green
1/2 yard: light green
1/3 yard: pink
1/3 yard: gray
1.75 yards for backing and binding of your choice
Batting
Baby Quilt Cutting Instructions:
Cut 2: dark green 6 1/2 inches x 27 1/2 inches (Top and bottom border)
Cut 2: light green 4 1/2 inches x 27 1/2 inches
Cut 2: Pink: 6 inches x 27 1/2
Cut 1: Gray: 8 inches x 27 1/2
Modern Baby Quilt Long Border Edges
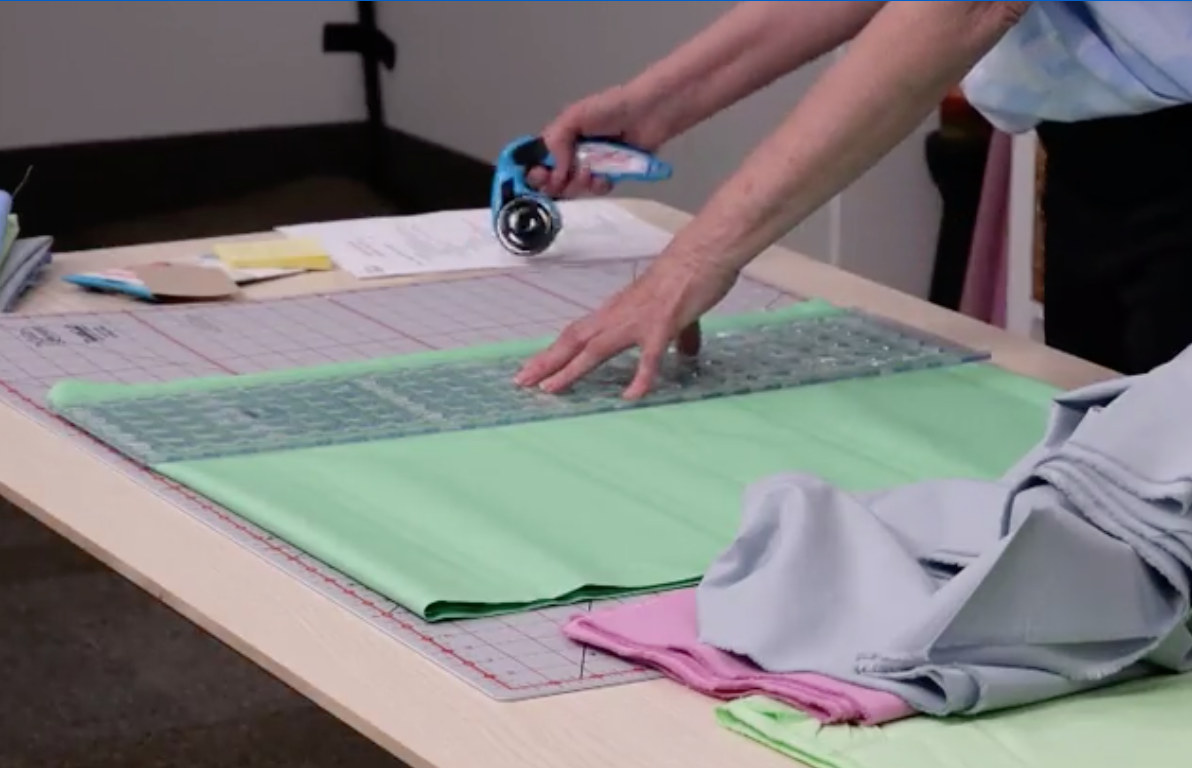
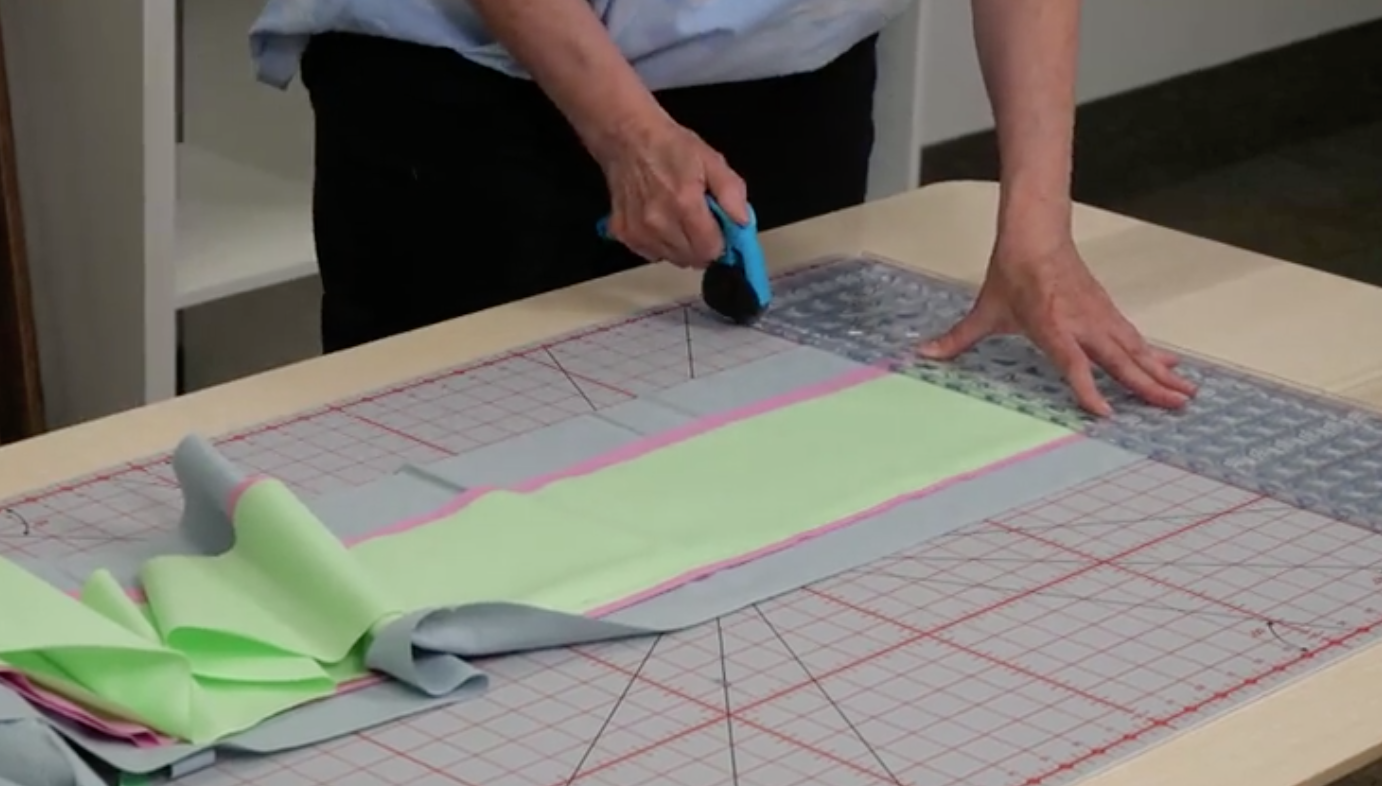
Cut the border first. Align your two pieces of darker green fabric and fold them into quarters. It will be a solid strip and not pieced together, and since we have chosen a solid border piece, you may have to fold your fabric to cut it on the mat. Once you’ve got it as straight as possible, trim the salvaged edge off of your border material with the My Comfort Cutter. Measure your 6.5”x27.5” strips with the TrueCut ruler and cut to create the side border pieces.
Modern Baby Quilt Short Border Edges & Center Stripes
In addition to the two dark green border pieces you just cut, you will need 3 (30” x 5.5”) pieces of the darker green material to complete your top, bottom, and center pieces of the border. Use your ruler and My Comfort Cutter to perfect any rough edges on your fabric strips as you trim the center pieces of this strip quilt to 27.5” wide. Repeat these steps for your gray, light green, and pink fabrics.
Center Stripe Design
Now comes the fun part. Set out your quilt strips and decide the order in which you’d like them to be sewn. Once you’ve organized the order of your colored strips, stack them and head to the sewing machine! You will sew a ¼” seam allowance. Sew your center line of strips first, then your border strips.
Sew one of the medium green 6.5” x 27.5” strips to a pink 5.5” x 27.5” strip using the ¼ “ seam allowance.
Next, sew one light green 5.5” x 27.5” strip to the previous pink strip.
Continue the pattern of strips as shown below to complete the center of the quilt.
Modern Baby Quilt Border
Begin the border by sewing one 6.5” x WOF (width of fabric) to the left side of the quilt top. Repeat the same process on the right side and cut off any excess fabric. There you have it! Your quilt top is ready to go. Cut some batting and backing to prepare for your quilt sandwich.
Pinning: Pin your two layers of fabric to align and hold them in place so that the edges don’t pull away from each other. If you choose not to pin, be mindful of the fabric alignment as you sew the edges, and be sure to manually hold or realign them as needed.
Seam & Fabric Awareness: Be sure to check that you’re sewing the seam on the correct side of your two pieces of fabric. It’s also important to be certain that you’re sewing your fabrics with the correct side facing up.
Hopefully, these tips and tricks will save you some time in your quilting projects. And fear not, if you sew a strip upside down and have to unpick it— we’ve all done it many times!
Now, let’s go over the pre-quilting checklist and quilt “sandwiching.” These necessary steps set you up for success and an easy, fun free motion quilting experience. Let’s begin with checking the components of our quilting machine to be ready for quilting!
Pre-Quilting Checklist
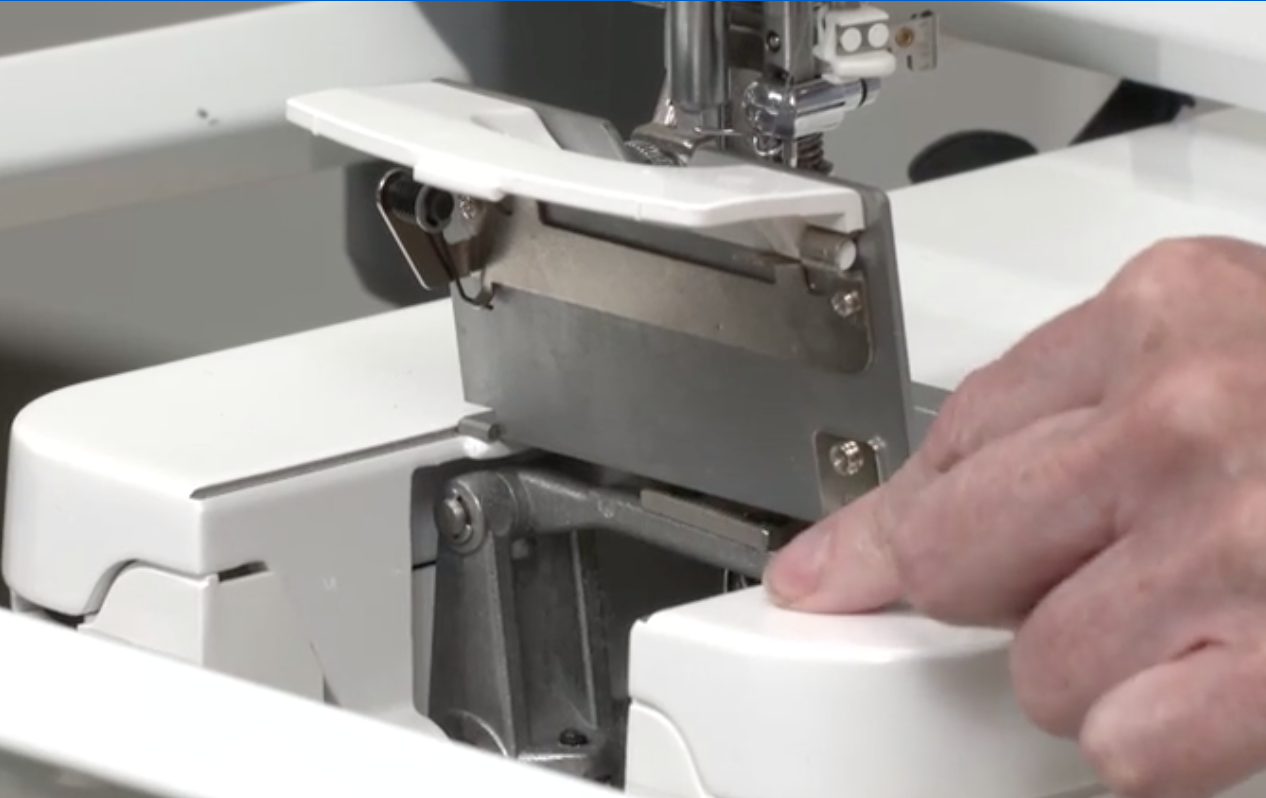
Quilting foot: This piece has a round opening at the bottom which will easily glide across your fabric. It is sometimes called a presser foot or an embroidery foot.
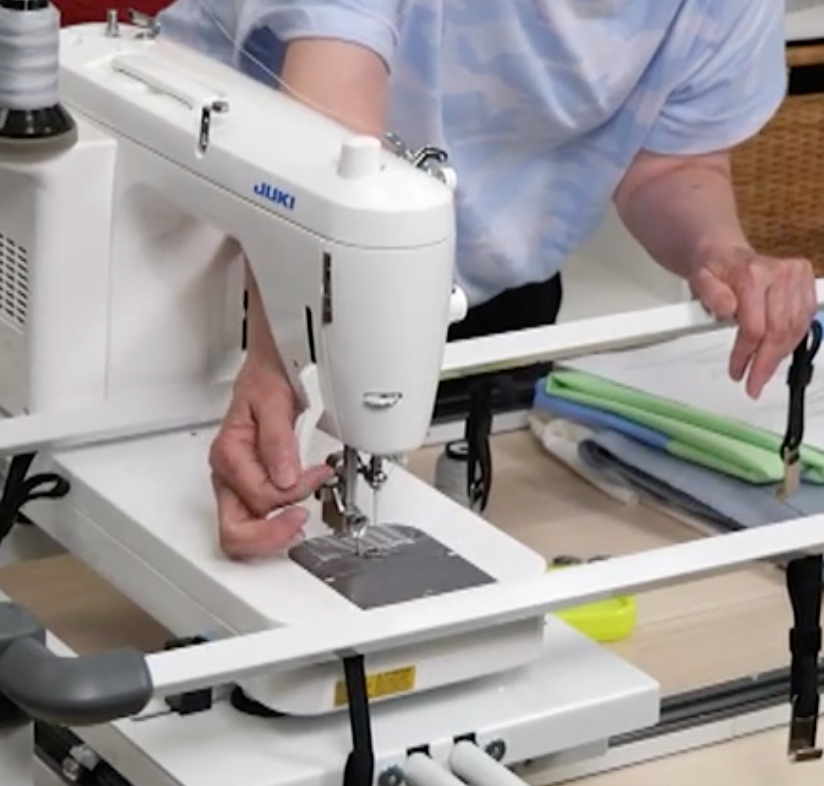
Bobbin: Be sure that it is filled and in place before you begin quilting this blanket.
Oil: Oil your machine REGULARLY. It is in the same compartment in which you fill the bobbin. Being mindful of keeping your machine well-oiled will make it run smoothly and produce more beautiful stitches for you.
Lint: Clean the dust bunnies from your bobbin case area, machine exterior (especially the wheels), and frame to increase the lifespan of your machine and frame. No chemicals needed! A damp rag will work perfectly for this job.
Hopping foot: Check the height of your hopping foot and be sure that when it is set in the down position it won’t be so close that it will grab the fabric being pulled through the machine. We want everything to simply glide. Check your manual or YouTube if you’re uncertain how to adjust the height.
Threading: Have you chosen a thread appropriate for your current quilting project? We love the Finesse thread because it’s a strong 50wt polyester thread that goes through your needle with ease. Because of its softer feel, it can be used for both piecing and quilting.
Bobbins: Wind your bobbins before you begin your project. Depending on how dense your design will be I would recommend winding several bobbins. Especially if you’re using your domestic machine vs. a long arm quilting machine because the bobbins will be much smaller. Having an extra bobbin case nearby is also a good idea.
Needles: We recommend that you gather a small stash of extra needles near your machine. On the off chance that you break the needle in your machine, you’ll be prepared.
Fabric: Have your top, backing, and batting cut and ready to quilt.
Once you’ve completed these steps, you’re ready to lay out your quilt, sandwich the layers, and bring it to your frame to be quilted.
Quilt Sandwiching
Backing
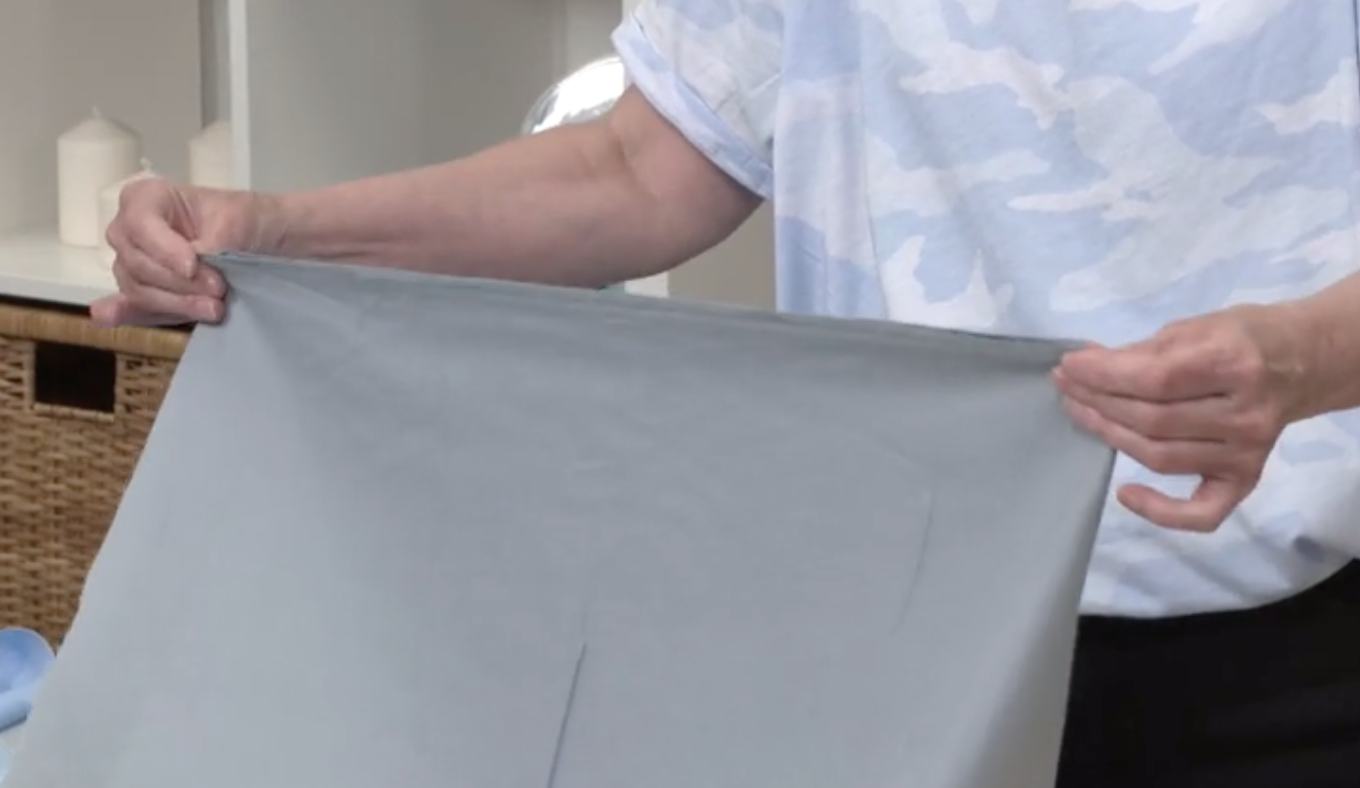
The first step in sandwiching is to lay out the backing of your quilt. Find the center point of the top and bottom of your backing by grabbing two ends of your fabric and folding it in half, making a crease at the center point, and marking it with a pin. This allows you to quickly align all three layers of the quilt sandwich. Repeat the same pinning process on the side of the quilt parallel to where you just pinned.
The reason we are sandwiching the three layers together is that we are working on a hoop frame. This differs from a rail frame where you roll each layer on separate poles of the frame which are quilted together as you go.
Batting
The trick to sandwiching this layer is to know which is the wrong and right side to have facing up. Face the smooth side down toward your backing and the rough, dimpled, fluffy side up toward your quilt top.
Just as you did with the backing, you’ll find and pin the center of the batting on both the top and bottom of the layer. Since the batting doesn’t crease as the backing does, have a pin handy to mark it when you fold the batting to find the center.
Next, you’ll fold the batting (you can also roll the batting, depending on your preference) twice into long quarters as shown in the photo below. Set the rolled or folded batting a few inches away from the edge of the backing. Be sure to double-check that the smooth side is still down and the soft side is still up. This process allows you to easily unroll the batting in sections without as many wrinkles.
Align your pins on either side of the quilt center to center and smooth out any persisting wrinkles in the batting before moving to the quilt top.
Quilt Top
You’ll repeat the steps above by finding the center of your quilt top and marking both sides with pins. Roll or fold the quilt top, align the pins with which you’ve marked the center points, and carefully unroll the quilt top to avoid wrinkles across your project.
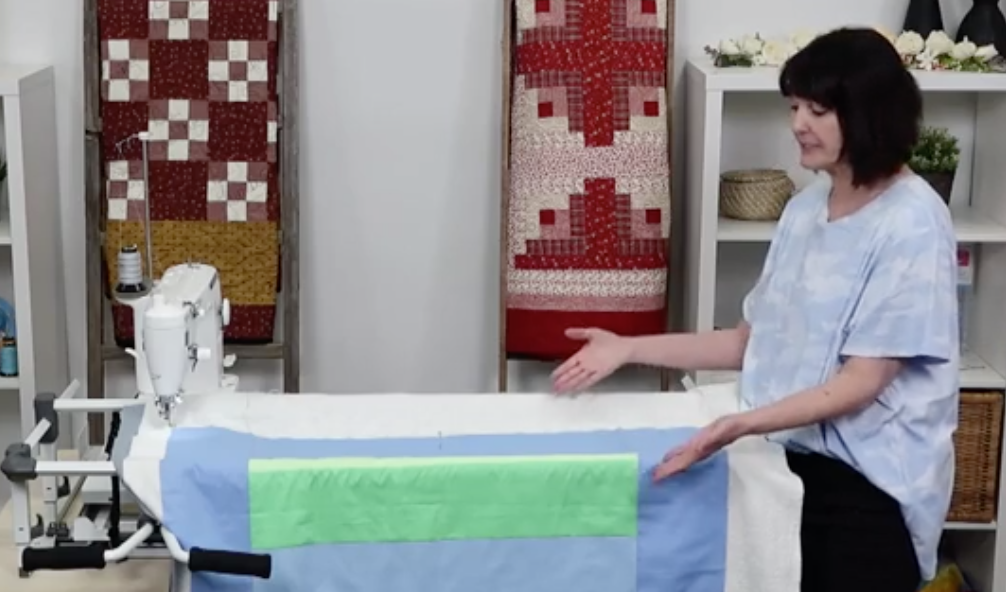
Loading Your Modern Baby Quilt
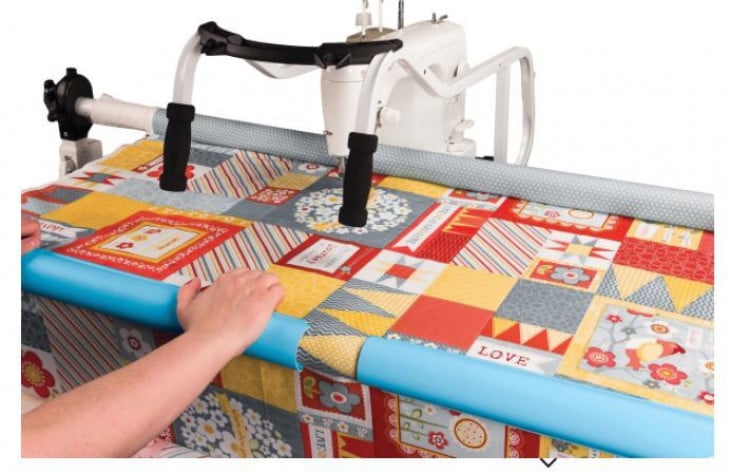
To load your quilt onto the frame, start by laying the sandwich of fabrics across the two rails as demonstrated above by Karla. In this photo, she is using the Cutie Tabletop Fabric Frame.
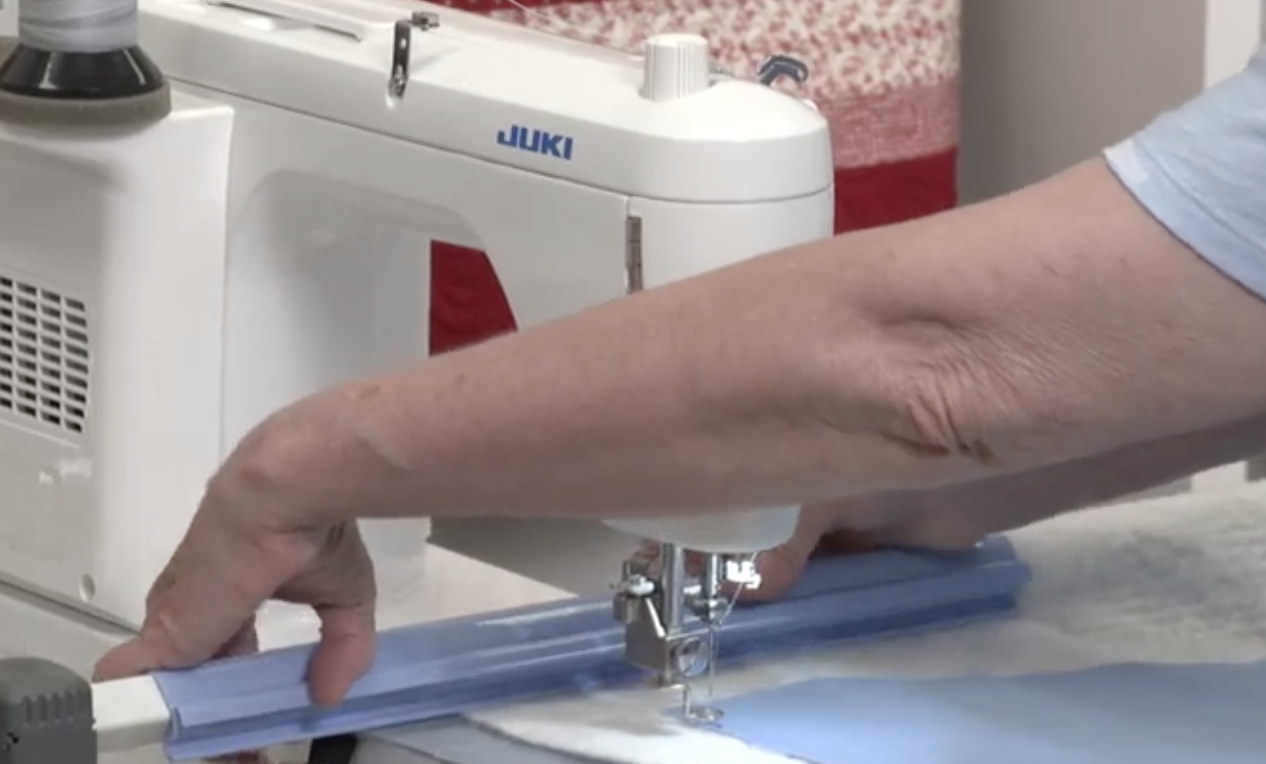
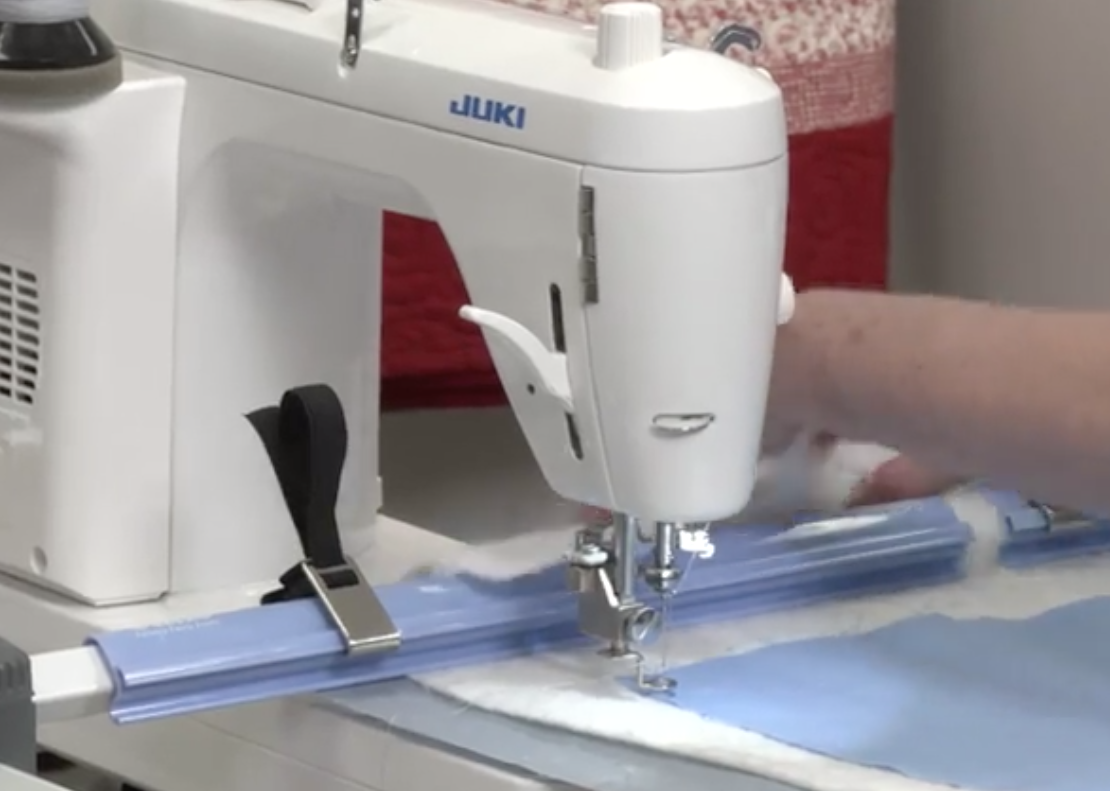
Once you’ve aligned your quilt sandwich onto the rails, check to make sure that your presser foot is up. If it’s not up, you’ll have a hard time moving your fabric underneath the presser foot, and as we mentioned earlier, we want everything to glide. At this point, it’s also important to move your machine to its edge to be certain you can quilt to the edge of your design without hitting the side fabric. Hitting the side will alter the appearance of your design.
With all that being said, you may now start clamping your quilt in place. Be sure to face the grooves of the clamps toward yourself as shown in the photo; otherwise, you won’t be able to adjust your straps. Place all three clamps along the length of the quilt as straight and aligned as possible.
Once you’ve secured the clamps across the quilt, use the adjustable straps to hold the clamps and excess fabric in place.
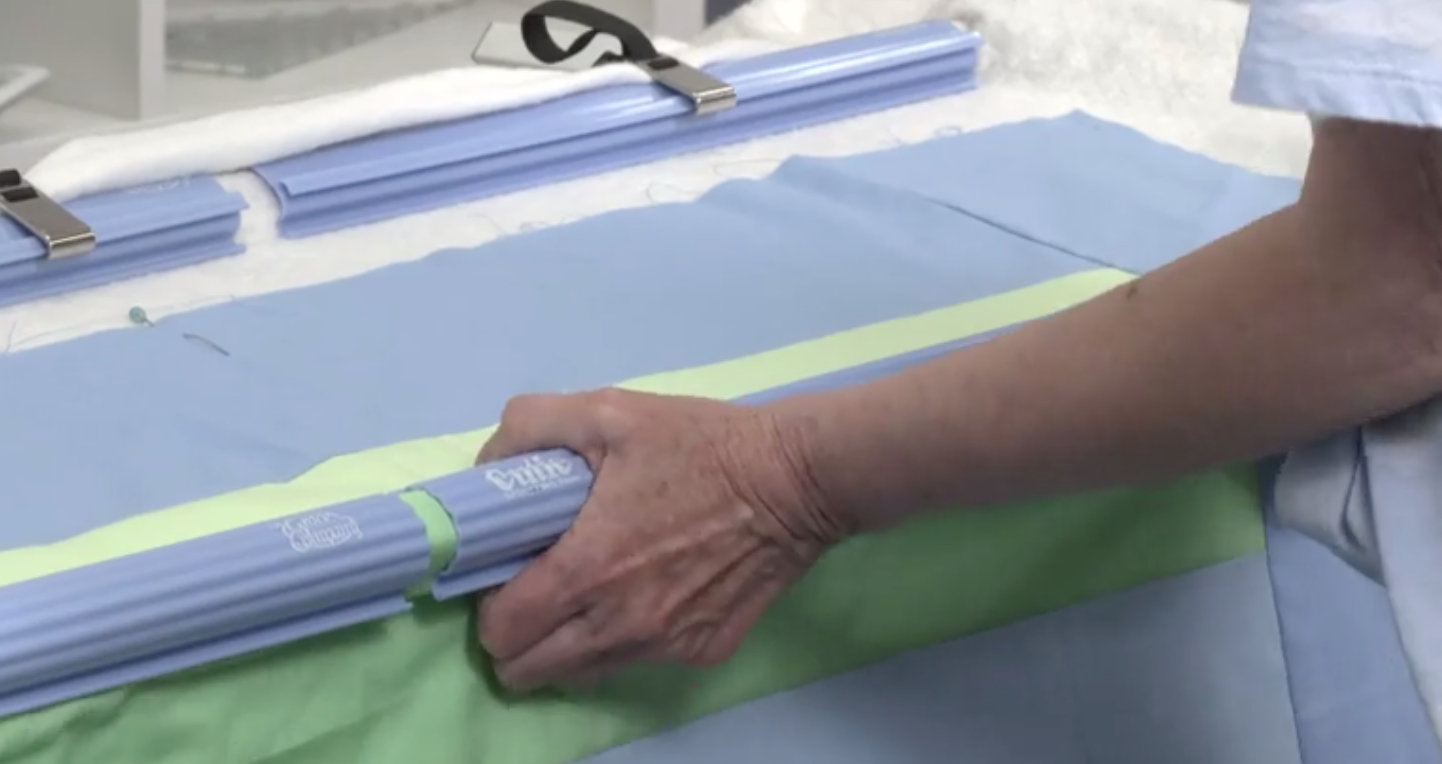
Align your quilt so that the bottom edge can be rolled up to be clamped into place.
As soon as the second set of clamps is in place, you may remove the pins from the center of your sandwich. Be careful to keep the layers aligned, roll the remaining quilt sandwich up to be secured with the straps.
“Tack” your quilt down by stitching as close to the edge as possible. By doing this, you’re also able to check how your machine is stitching. It can be helpful to split your fingers and sew between them during this step, as shown by Karla in the photo below. This method pulls the excess as you move across your quilt and removes wrinkles before you run over them with your machine. Just like the other side, stop the tacking down process just before you hit the edge.
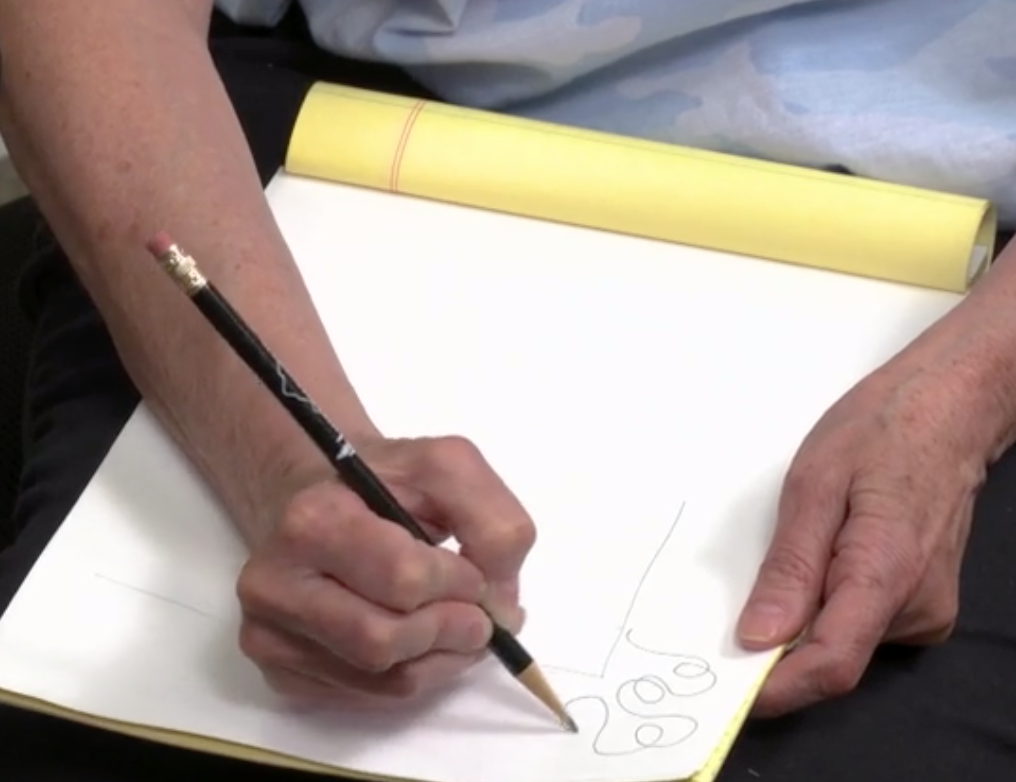
If you’re new to free motion quilting, we have one piece of advice for you:
DOODLE!
Think of it as your free-motion quilt design blueprint. Doodling on paper helps you learn how to create your free-motion quilting design with your machine. It helps you understand how the design will fit the more awkward spaces like corners. Another advantage to doodling is you get to work out the flaws of your design without wasting any fabric or thread.
Once you’ve doodled your design on paper, you can move over to your machine and trace it across your quilt top with your needle unthreaded. By unthreading the needle, the thread won't catch the fabric and sew your design onto the quilt. The purpose of all this practice is to get your muscle memory familiar with the movements necessary to create the meandering design you desire. You’ll have added confidence that you know exactly which direction to move and when to include loops.
When you feel secure in your design and you’ve re-threaded your machine, we advise that you do these two things to set yourself up for success before you begin free motion quilting.
Pull up the bobbin thread to keep the top and bottom of the quilt design clean-looking.
Use a tie-off stitch at the beginning of your design to secure the thread.
Now, you’re ready to begin! Start by quilting the design slowly, and increase your speed as you gain confidence in how you’re laying out your design. Don’t worry about making your designs perfect. The charm of free motion quilting is the organic nature of the designs.
Happy Quilting!
- The Grace Family
Products used in this tutorial:
Cutting Mats:
https://truecut.graceframe.com/en/product/cutting-mats
Ruler:
https://truecut.graceframe.com/en/product/truecut-rectangle-quilting-ruler
TrueGrips:
https://truecut.graceframe.com/en/product/truegrips
My Comfort Cutter:
https://truecut.graceframe.com/en/product/my-comfort-cutter
Finesse Threads:
https://www.graceframe.com/en/accessories/finesse-threads
Cutie Frame:
https://www.graceframe.com/en/machine-frames
For over 25 years the Grace Company has been the leading manufacturer of high quality quilting frames and quilting accessories. What truly sets The Grace Company apart from other competitors is its level of quality, value, and experience toward all their endeavours. From products to external and internal customer experience, the Grace Company responds to market and customer needs and continues to lead the quilting industry. Grace Company frames and hoops are designed to be easy to build and compatible with most major quilting machines. They'll have the quilting product you need.